EN
EN English
 Español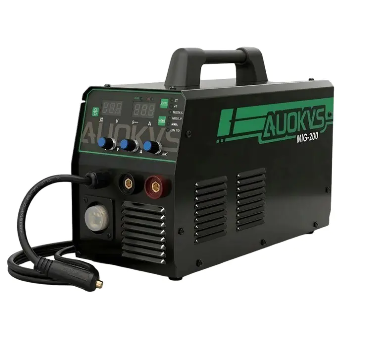
Initial preparation before setting up an OEM Light Industrial Welder
Before using an OEM Light Industrial Welder, the surrounding conditions usually need a bit of attention. The machine itself may be ready, but the space around it often is not.
A workbench might be crowded, cables may already run across the floor, or the power source might not be checked yet. These things seem small, but they tend to affect how smoothly the setup goes later.
In practice, preparation often feels like organizing the space rather than installing a machine. Clearing the floor, making room around the working area, and checking where the power comes from are all part of the process. It is less about following strict steps and more about making the environment workable.
In many workshop discussions, setup is treated as part of daily workflow rather than a separate task. References connected with ChuangLi Electronic Technology Co., Ltd. sometimes appear in these conversations, especially when equipment handling and preparation are discussed together.
Power source evaluation for OEM Light Industrial Welder installation
Power conditions are not always the same from one place to another. An OEM Light Industrial Welder depends on steady input, so it helps to take a moment and look at what is actually available.
Sometimes the voltage is stable, sometimes it shifts slightly depending on other equipment running nearby. These changes are not always obvious at first, but they can show up once the machine starts working.
This is where an OEM Custom Voltage Welder becomes useful. It allows some flexibility when the power source is not perfectly matched, so the setup does not need to be changed entirely.
A few simple checks usually make a difference:
- Where the power line comes from
- Whether other machines share the same source
- If the supply tends to fluctuate during the day
Nothing complicated here, just a quick look before connecting everything.
Workspace layout planning for stable welder operation
The position of the machine often decides how comfortable the work feels. An OEM Light Industrial Welder is usually moved into a space that already has its own rhythm, so it has to fit in rather than take over.
Placing it too close to a wall can make cable movement awkward. Leaving it in the middle of a busy path can create small interruptions. Finding a balanced spot usually works better.
Cables tend to tell the story. If they stretch naturally without pulling or crossing too many paths, the layout is probably fine. If they twist or get in the way, the position might need a slight change.
There is no fixed rule here. It is more about observing how the space is used and adjusting the machine so it does not interrupt that flow.
Unpacking and inspecting OEM Light Industrial Welder components
Unpacking often feels straightforward, but it is one of those moments where small details can be noticed early.
The main unit, cables, and accessories come out one by one. At this stage, it is useful to take a quick look rather than rushing into installation. Loose fittings, bent connectors, or missing parts are easier to deal with before everything is connected.
It also helps to get familiar with the layout of the machine. Where the cables connect, how the torch fits, and how the controls are arranged. This saves time later when adjustments are needed.
Connecting power and grounding for safe operation
Once everything is in place, the machine can be connected. This part is usually simple, but it needs a bit of care.
Grounding is one of those steps that can be overlooked when things feel routine. Still, it plays a role in keeping the machine stable during use. A firm connection helps avoid small irregular behaviors that can appear during operation.
Cables should sit naturally without being pulled tight. Connections should feel secure, not forced. If something does not fit easily, it is often better to pause and check rather than push it into place.
Installing welding torch and cable system
The torch and cable system is where handling starts to matter more. This is the part that moves during work, so its position should feel natural.
If the cable bends too sharply, it tends to resist movement. If it is too loose, it may drag along the floor. Finding a middle ground usually works best.
The torch connection itself should be firm but not over-tightened. Once it is in place, a quick check by moving the cable slightly can show whether everything is aligned properly.
Gas supply setup when required in welding process
When gas is part of the setup, it adds another small layer to the process. The connection between the cylinder and the machine should feel stable and direct.
The regulator is usually the first point to check. It should sit properly without leaning or shifting. The hose should follow a clean path without twists.
Before starting, a brief check is often enough:
- Whether the connection feels secure
- If the hose runs smoothly without bends
- Whether the flow seems steady when opened
These checks are simple, but they help avoid interruptions once work begins.
Setting initial parameters on OEM Light Industrial Welder
Adjusting the machine settings is usually done step by step. There is no need to rush into a fixed setting right away.
An OEM Light Industrial Welder often responds better when changes are made gradually. Small adjustments make it easier to notice how the machine reacts.
With an OEM Custom Voltage Welder, there is a bit more room to adapt. It can adjust to different power conditions, which makes the setup feel less restricted.
The controls themselves are usually straightforward. Spending a little time getting familiar with them helps later during actual work.
Basic setup reference for OEM Light Industrial Welder
A simple overview can help keep track of the setup process:
| Setup Element | Purpose In Operation | Practical Note |
|---|---|---|
| Power Connection | Supplies energy to the machine | Check before switching on |
| Grounding Cable | Keeps operation stable | Ensure firm contact |
| Welding Torch | Directs welding activity | Keep cable relaxed |
| Gas Supply | Supports process when needed | Check flow briefly |
| Control Panel | Adjusts machine behavior | Start with small changes |
Testing machine performance before actual welding
Before starting real work, it helps to run the machine briefly. This is not about full operation, just a quick check.
Turning it on and observing how it behaves gives a sense of whether everything is connected properly. Sounds, light indicators, and general response can reveal small issues early.
If something feels slightly off, it is easier to adjust at this stage. Once actual work begins, stopping midway can be more inconvenient.
Material preparation and positioning before welding
Before starting real work, the material usually needs a quick check. It sounds simple, but it often decides how smooth the welding process will feel later.
Metal surfaces are rarely ready straight away. There may be dust, light oil, or marks left from storage. These things do not always look serious, but they can affect how the arc behaves once the OEM Light Industrial Welder is running. A quick clean is usually enough to make the surface more stable for work.
Positioning is another part that tends to get overlooked. If the material shifts even slightly during welding, the path becomes harder to control. Most operators tend to fix it in place first, even with simple tools, just to avoid movement.
It is not a complicated step. More like setting things still before anything starts.
Safety considerations during setup process
Safety usually sits in the background of the setup process, but it becomes noticeable once the machine is switched on.
Protective gear is normally prepared without much thinking. Gloves, eye protection, and covering clothing are common choices. They are not there for decoration, just to make the working space more manageable.
The surrounding area also matters. Tools, cables, and loose materials are often moved away from the working zone. It keeps the space clearer, especially when the OEM Light Industrial Welder is in operation.
Airflow is another simple point. Some workshops feel enclosed, and a bit of ventilation helps the environment feel more comfortable during work.
Nothing complicated here, just practical habits that build up over time.
Common setup issues and practical adjustments
Even when everything looks ready, small issues can still appear once the machine starts running.
Sometimes the arc feels unstable at the beginning. Other times the output changes slightly after a short period of use. These situations are not unusual and often come down to small setup differences.
Instead of changing everything at once, adjustments are usually made step by step. One small change at a time helps show what is actually affecting the machine.
A few things that often get checked:
- Cable position and whether it is under tension
- Grounding connection stability
- Slight adjustments in control settings
- Power input consistency
Most of the time, it is not one big issue, just a small mismatch somewhere in the setup.
Maintenance checks after initial setup
After the first use, it is common to go back and look over the machine again. Not a full inspection, just a quick pass over the main parts.
Connections sometimes loosen slightly after movement, especially around cables. Tightening them again helps keep things steady for next use.
The torch area may also need a quick clean depending on how long the machine has been running. Nothing heavy, just removing small residue.
Cables are worth checking as well. If they have been dragged or bent during use, adjusting their position helps reduce wear over time.
This kind of routine usually becomes part of daily work rather than a separate task.
Role of OEM Custom Voltage Welder in different environments
Not every workshop has the same electrical conditions. Some places stay stable, while others shift slightly depending on how many machines are running.
An OEM Custom Voltage Welder helps in situations like this. Instead of requiring a perfect match from the power source, it allows some adjustment so the machine can still run in different environments.
This becomes useful when equipment is moved between locations or used in shared workshop spaces. The setup process does not change much, but the machine feels easier to adapt.
It is less about adding complexity and more about reducing pressure on the environment to stay exactly the same.
Coordination between user requirements and manufacturing design
Behind the setup process, there is usually a quiet link between how the machine is built and how it is actually used.
An OEM Light Industrial Welder is not designed for one fixed situation. It ends up being used in different spaces, with different power conditions and working habits.
From the user side, expectations change depending on the task. From the manufacturing side, the structure is shaped so it can handle those differences without forcing a strict setup method.
Cable length that allows movement, controls that are easy to reach, connection points that do not require awkward positioning.
It does not feel like a rigid system. More like something that adjusts quietly depending on where it is placed.
 Previous